Graylog for Homelab (on Ubuntu 24.04 LTS)
Creating a log indexing source with Graylog and Ubuntu 24.04 in 2026.

It's 2026, and I'd like to set up a SIEM-like logging repository now that my hypervisor setup is changed, network migrated, data lost, and plenty of other fun shenanigans. Let's begin:
Prerequisites
- Latest stable version (Graylog 6.1) prerequisites:
- Ubuntu 22.04, or 24.04
- At least 4 GB RAM and 2 CPUs
- A sudo user
- Internet access
- The superior editor, Vim
Dependency Installations
Java
Graylog requires Java 17 or later.
sudo apt update
sudo apt install openjdk-17-jre-headless -y
MongoDB
Graylog uses MongoDB for metadata and user data.
curl -fsSL https://pgp.mongodb.com/server-6.0.asc | sudo gpg --dearmor -o /etc/apt/trusted.gpg.d/mongodb-server-6.0.gpg
echo "deb [ arch=amd64,arm64 signed=/etc/apt/trusted.gpg.d/keyrings/mongodb-server-6.0.gpg ] https://repo.mongodb.org/apt/ubuntu jammy/mongodb-org/6.0 multiverse" | sudo tee /etc/apt/sources.list.d/mongodb-org-6.0.list
sudo apt update
sudo apt install mongodb-org -y
Graylog Server
Add the Graylog repository and install the server package.
wget https://packages.graylog2.org/repo/packages/graylog-6.1-repository_latest.deb
sudo dpkg -i graylog-6.1-repository_latest.deb # latest version is 7.0.1
sudo apt update
sudo apt install graylog-server -y
Graylog Data Node
Add Graylog data node for searches & indexing.
sudo apt update
sudo apt install -y graylog-datanode
Configuration
Passwords
Generate a 96-character random password for password_secret:
< /dev/urandom tr -dc A-Z-a-z-0-9 | head -c${1:-96}; echo; Copy the output. Edit the server configuration file and update: password_secret = your_generated_password_secret:
sudo vim /etc/graylog/server/server.conf Edit the data node configuration file and update: password_secret = your_generated_password_secret:
sudo vim /etc/graylog/datanode/datanode.confValidation
Java
java -version
MongoDB
sudo systemctl daemon-reload
sudo systemctl enable --now mongod
sudo systemctl status mongod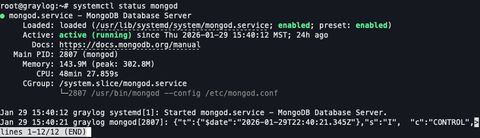
Data Node
sudo systemctl daemon-reload
sudo systemctl enable --now graylog-datanode
sudo systemctl status graylog-datanode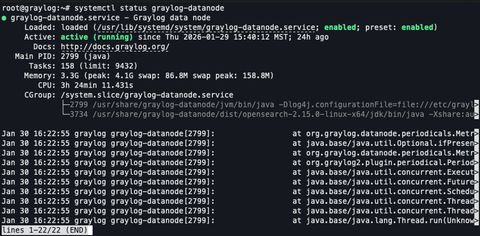
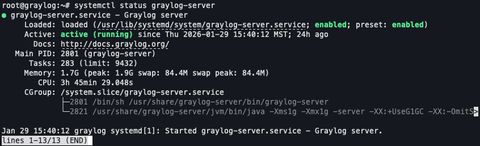
Server Node
sudo systemctl daemon-reload
sudo systemctl enable --now graylog-server
sudo systemctl status graylog-server
Troubleshooting
My graylog datanode kept crash-looping with misleading “permission denied” and “invalid configuration” errors. Systemd would restart the service repeatedly and the “real” failure kept changing depending on which directory/log file was failing first.
Some examples: it complained it couldn’t write its own datanode log. Later it complained a required directory didn’t exist. Also, journald output was often uninformative because Log4j2 failed before the app could log normally.
- graylog-datanode.service: Main process exited, status=1/FAILURE
- Cannot write to directory opensearch_config_location ... /var/lib/graylog-datanode/opensearch/config
- RollingFileManager (/var/log/graylog-datanode/datanode.log) ... (Permission denied)
- opensearch_logs_location ... /var/log/graylog-datanode/opensearch: Directory doesn't exist
Permissions
Correcting ownership/permissions for Data Node + OpenSearch state directories. Used namei -l to confirm whether any parent directory blocked traversal or write access.
sudo namei -l /var/lib/graylog-datanode/opensearch/config
sudo chown -R graylog-datanode:graylog-datanode /var/lib/graylog-datanode
sudo chmod 0755 /var/lib/graylog-datanode /var/lib/graylog-datanode/opensearch
sudo chmod 0750 /var/lib/graylog-datanode/opensearch/config /var/lib/graylog-datanode/opensearch/data
Validated write access as the service user.
sudo -u graylog-datanode bash -lc '
    set -e
    touch /var/lib/graylog-datanode/opensearch/config/.write_test && rm -f /var/lib/graylog-datanode/opensearch/config/.write_test
    touch /var/lib/graylog-datanode/opensearch/data/.write_test && rm -f /var/lib/graylog-datanode/opensearch/data/.write_test
    echo "opensearch dirs: OK"
    '
Validated perms and recreated the log file with correct ownership by creating the missing OpenSearch logs directory (opensearch_logs_location). Once Log4j2 wasn’t blocking everything, Graylog reported opensearch_logs_location ... /var/log/graylog-datanode/opensearch. Directory doesn't exist. Created it with correct ownership:
sudo install -d -o graylog-datanode -g graylog-datanode -m 0755 \
sudo install -d -o graylog-datanode -g graylog-datanode -m 0755 /var/lib/graylog-datanode/opensearch
sudo install -d -o graylog-datanode -g graylog-datanode -m 0750 /var/lib/graylog-datanode/opensearch/config
sudo install -d -o graylog-datanode -g graylog-datanode -m 0750 /var/lib/graylog-datanode/opensearch/data
Logging
Fixing logging (Log4j2 RollingFile appender was failing early and hiding real errors) in /var/log/graylog-datanode/datanode.log
sudo mkdir -p /var/log/graylog-datanode
sudo chown -R graylog-datanode:graylog-datanode /var/log/graylog-datanode
sudo chmod 0755 /var/log/graylog-datanode
sudo install -o graylog-datanode -g graylog-datanode -m 0644 /dev/null \
sudo -u graylog-datanode test -w /var/log/graylog-datanode/datanode.log && echo "datanode.log writable"
Temporarily forcing Log4j2 to console-only and disabling systemd restarts so I could see the real fatal exception immediately.
sudo mkdir -p /etc/systemd/system/graylog-datanode.service.d
sudo tee /etc/systemd/system/graylog-datanode.service.d/norestart.conf >/dev/null <<'EOF'
[Service]
Restart=no
RestartSec=0
EOF
sudo systemctl daemon-reload
sudo systemctl reset-failed graylog-datanode
Once the root cause was visible, the service started normally... Replace Log4j2 with console-only instead of RollingFile.
sudo cp -a /etc/graylog/datanode/log4j2.xml /etc/graylog/datanode/log4j2.xml.bak.$(date +%F_%H%M%S)
sudo tee /etc/graylog/datanode/log4j2.xml >/dev/null <<'XML'
<?xml version="1.0" encoding="UTF-8"?>
<Configuration status="trace">
  <Appenders>
    <Console name="Console" target="SYSTEM_ERR">
      <PatternLayout pattern="%d{ISO8601} %-5p [%c{1}] %m%n"/>
    </Console>
  </Appenders>
  <Loggers>
    <Root level="info">
      <AppenderRef ref="Console"/>
    </Root>
  </Loggers>
</Configuration>
XML
Helpful Commands
Easy way to debug launch failure logs:
sudo ss -lntp | grep ':9000'
sudo tail -n 200 /var/log/graylog-datanode/datanode.log # tail the output
sudo tail -n 200 /var/log/graylog-server/server.log # tail the output
sudo journalctl -u graylog-server -n 120 --no-pager # most recent 120 lines of output from logfile
sudo journalctl -u graylog-datanode -n 120 --no-pager # most recent 120 lines of output from logfile
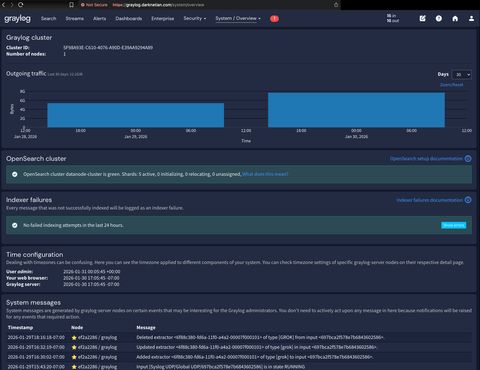
Access
I wonder if the newer version fixes any of this. Oh well, too late now. Everything is up and running by this point, let's log in.Ensure you know your preflight password.
sudo grep -iE "preflight|credentials|username|password" /var/log/graylog-server/server.log | tail -n 60 # find admin passwordTest API access.
curl -i -u admin:'preflight_password' -H 'X-Requested-By: cli' http://127.0.0.1:9000/api/system/overviewIf this returns 200 OK, you are ready to log in. Open your browser and go to http://your-server-ip:9000, log in with: Username: admin Password: preflight_password.

(Optional) NGINX
If you'd like to install a reverse proxy to access the service on 443 as opposed to port 80, let's do that. I like to use SVCB / HTTPS records for this purpose.
sudo apt install nginx -y
sudo vim /etc/nginx/sites-available/graylog.conf
Let's create the nginx configuration. Add:
server {
  listen 80;
  server_name graylog.darknetian.com;
  return 301 https://$host$request_uri;
}

server {
  listen 443 ssl http2;
  server_name graylog.darknetian.com;

  ssl_certificate     /etc/nginx/ssl/graylog.crt;
  ssl_certificate_key /etc/nginx/ssl/graylog.key;

  location / {
    proxy_pass http://127.0.0.1:9000;

    # standard reverse-proxy headers
    proxy_set_header Host              $http_host;
    proxy_set_header X-Real-IP         $remote_addr;
    proxy_set_header X-Forwarded-For   $proxy_add_x_forwarded_for;
    proxy_set_header X-Forwarded-Proto $scheme;

    # Graylog-specific: tells Graylog its external URL
    proxy_set_header X-Graylog-Server-URL https://$server_name/;

    # keep auth header intact
    proxy_set_header Authorization $http_authorization;
  }
}
Install local CA cert or generate random one.
sudo mkdir -p /etc/nginx/ssl
sudo openssl req -x509 -nodes -newkey rsa:4096 -days 825 \
  -keyout /etc/nginx/ssl/graylog.key \
  -out /etc/nginx/ssl/graylog.crt \
  -subj "/CN=graylog.darknetian.com" \
  -addext "subjectAltName=DNS:graylog.darknetian.com"
Enable nginx.
sudo ln -s /etc/nginx/sites-available/graylog.conf /etc/nginx/sites-enabled/graylog.conf
sudo nginx -t && sudo systemctl reload nginx
Edit graylog to sit behind it.
sudo vim /etc/graylog/server/server.confMy server name is graylog.darknetian.com, yours will be different. Add:
http_bind_address = 127.0.0.1:9000
http_external_uri = https://graylog.darknetian.com/
Make your last access changes to the host firewall and restart services.
sudo ufw status
sudo ufw allow 'Nginx Full'   # opens 80 + 443
sudo systemctl restart graylog-server
Enjoy your running graylog instance.
Spot a typo or want to suggest a change? Edit lands as a PR against the public mirror.